
Care and Maintenance for Hydrangeas
Hydrangeas are prized for their large, showy flower heads that come in a variety of shapes and colours, including shades of blue, pink, white, and purple. The colour of hydrangea flowers can even change based on the PH of the soil, offering a unique and dynamic display throughout the growing season. The plant itself is very hardy at H6 making it perfect for the British climate. These vibrant blooms can create striking focal points, lush hedges, or even serve as beautiful potted plants.
In this section, you’ll find everything you need to know about planting, growing, and maintaining hydrangeas. From watering and soil requirements to pruning techniques and pest control, our comprehensive guides will help you keep your hydrangeas healthy and beautiful. Whether you’re looking to create a lush hydrangea hedge or simply add a splash of color to your garden, we’re here to support you every step of the way.
When & Where to Plant?
Hydrangeas can be planted year-round but for best results plant them in autumn or spring when the ground is moist and not frozen.Planting in summer is possible, but you’ll have to water more often to avoid the plant drying out before its roots can establish.The best place to plant the majority of Hydrangeas is going to be in a spot that hasmorning sun, and afternoon shade.
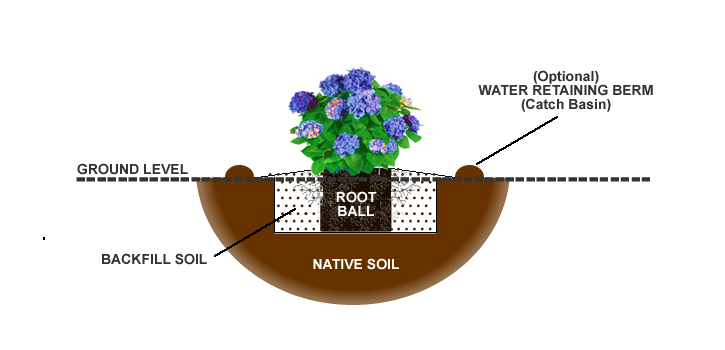
Hydrangeas thrive in moderately moist soil. Ideally, incorporate moisture-retentive, well-rotted garden compost into the soil before planting to prevent it from drying out. Soak your hydrangea in water to hydrate the roots before planting, then water thoroughly. Continue to water frequently for several weeks to help the plant establish itself. Mulching can also help to keep the roots moist.Ensure you don’t plant the hydrangea deeper than it was in its original pot.Maintain good watering throughout the plant’s first spring and summer.
Hydrangeas can thrive in various soil types, whether alkaline or acidic. They are also suitable to be planted in clay. However, the soil’s pH can affect the flower colour of certain varieties. For instance, some plants that typically produce pink flowers will turn blue in acidic soil.
Caring for Hydrangeas
Watering
When watering hydrangeas, aim your watering can or hose at the base of the plant, not the leaves, to avoid encouraging powdery mildew. It’s best to water plants early in the morning because watering later in the day, when the sun is higher, leads to faster evaporation.
Water newly planted hydrangeas during dry periods and mulch in autumn to retain moisture. Established plants usually have deep roots that can find water during summer, but you can water them thoroughly once a week during prolonged dry spells.
The frequency of watering depends on natural rainfall, sunlight, soil type, and the plant’s age. In their first year, hydrangeas should be watered weekly from early April to mid-June and possibly twice a week from mid-June to mid-September. From mid-autumn to mid-spring, they should only need watering if there is a lack of natural rain.
Since there is no shortage of rain in the UK during these months, hydrangeas are the perfect plant for your garden.In later years, they should only require watering in periods of lower-than-average rainfall, mainly during summer.If a hydrangea runs short of water it will let you know by wilting. However, don’t let it get to this stage because each time they wilt, they lose some of their vigour.
Pruning
A guide to pruning your Hydrangeas depending on the various species we offer.
Hydrangea Macrophylla ‘Red Baron’
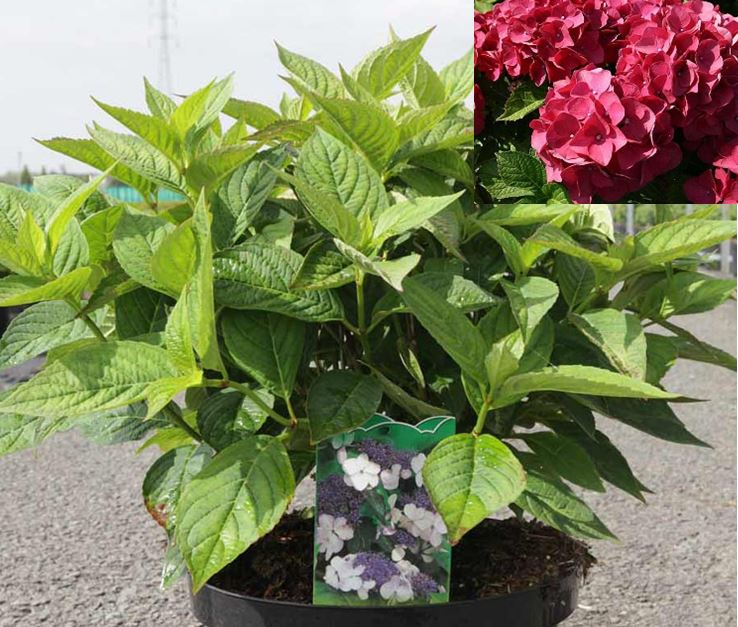 |
Hortensia hydrangeas are compact bushy deciduous shrubs with broadly ovate leaves and rounded flower clusters composed almost entirely of showy sterile flowers.The soil pH affects the flower color; acid soils produce blue flowers, and alkaline soil turns their big, bold flowers pink. Flowering Calendar: Jun- Nov |
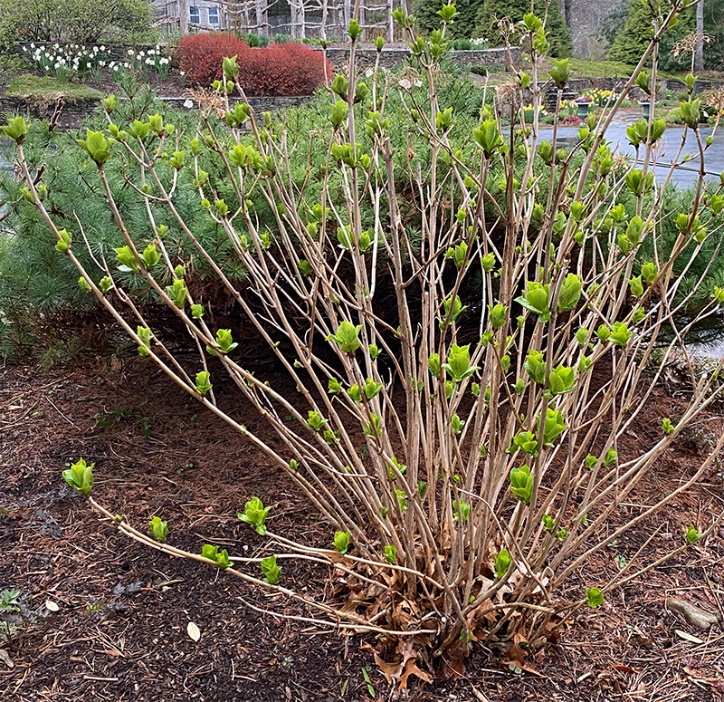
• This species blooms on old wood, setting their flower buds from late summer to early fall. This speciesrequires minimal pruning, mainly to control shape and size. Never remove more than one-third of their total growth. Pruning in the spring or late fall will remove the flower buds and prevent blooming for the year.
• Prune when most of the flowers have faded. Start by removing stems that are clearly dead or weak. Avoid pruning all the old wood, as it is essential for continued blooming as new growth matures. Trim spent flowers as they fade to keep the plant looking tidy.
Showcased below is a fully pruned Hydrangea Macrophylla:
 |
Check out this video to guide you through your pruning:
Hydrangea Serrata ‘Bluebird’
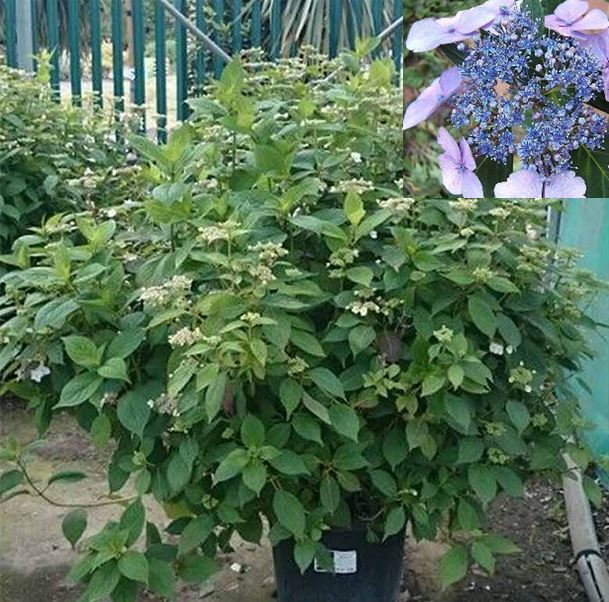 |
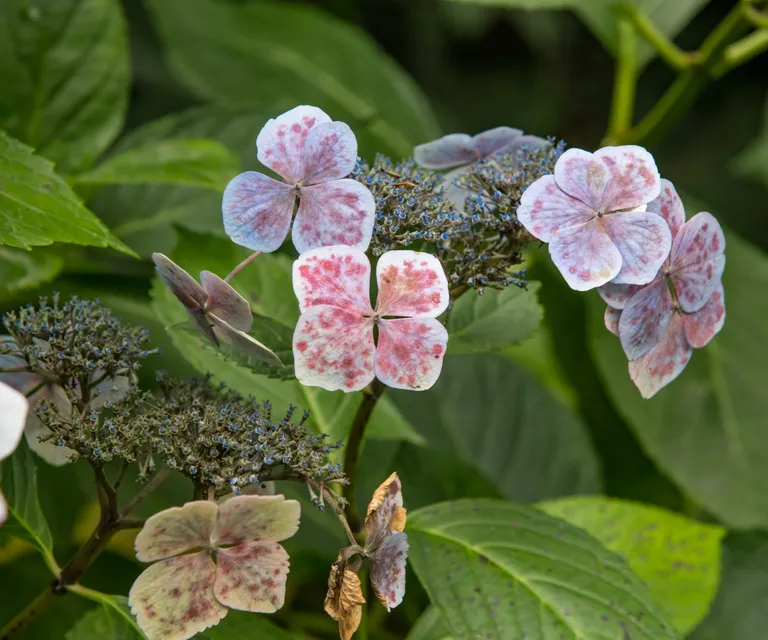
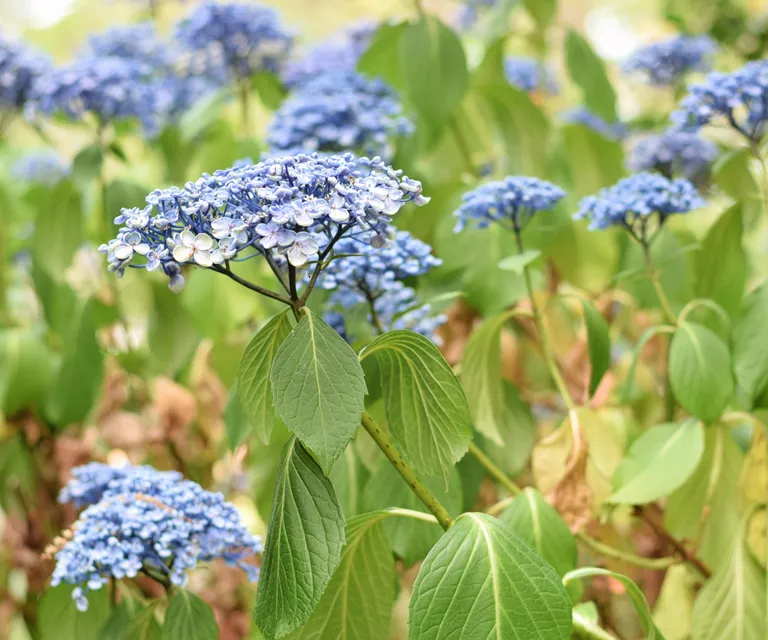
Hydrangea serrata is a smaller, more compact version of the Bigleaf hydrangea, featuring lace cap flowers whose colour varies with soil PH. It blooms on old wood and, due to its compact 2–4-foot size, rarely requires pruning. If pruning is necessary, it should be done immediately after flowering. Flowering Calendar: July- September |
• Deadheading is the process of removing spent flowers from plants to encourage more blooms and prevent seed production, helping to redirect the plant’s energy into producing more flowers rather than seeds. If desired, mopheads should only be deadheaded in milder areas.
• The dead blooms can add interest throughout winter and protect the new tender growth below from frost damage. Wait until mid-spring before cutting back the stems to the first or second pair of strong, healthy buds below the faded bloom.
• Leave old flowers over winter to protect new growth from the cold. Cut back the flowerhead just above the top set of plump buds forming beneath it, as this is where new flowers will emerge.
• Pruning Hydrangea serrata should be done cautiously as it blooms on old wood and has minimal pruning needs.
• Prune in mid-spring with light and regular pruning. Remove any dead or winter-damaged stems to the ground in early spring before new growth begins.
Showcased below is a fully pruned Hydrangea Serrata:
 |
Check out this video to guide you through your pruning:
Hydrangea Arborescens ‘Annabelle’
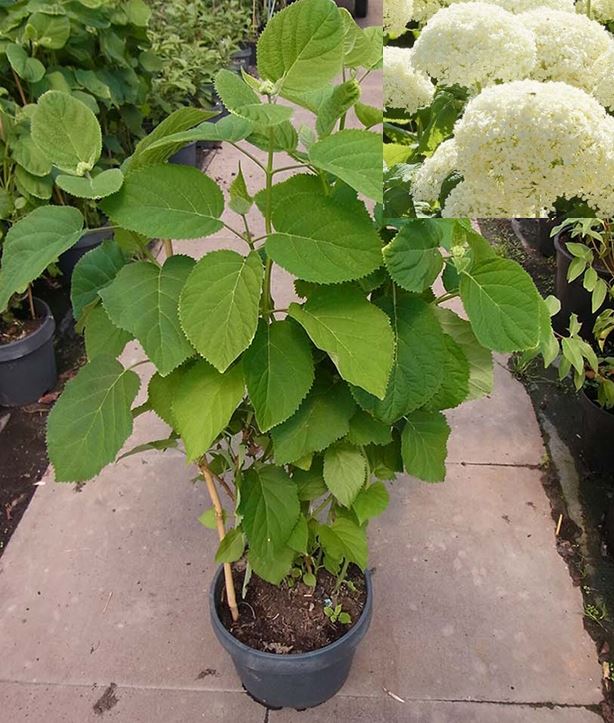 |
The remarkable shrub produces large spherical flower heads that create a stunning contrast with its dark green foliage. It’s particularly striking in shady borders and highly valued by flower arrangers for crafting elegant dried flower arrangements. Annabelle hydrangeas are simple to prune as they produce their flowers on new wood each year.They do not require lots of tricky pruning and the shrubs will continue to bloom every year even without any trimming. Flowering Calendar: June – August |
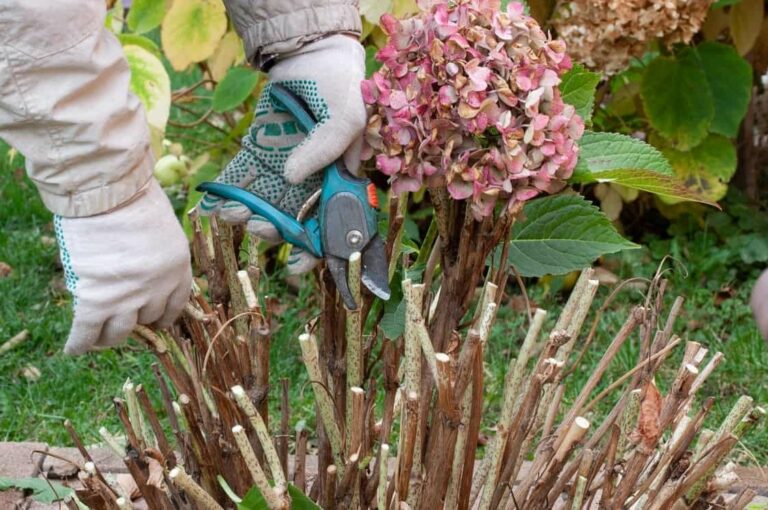
• Blooming on new wood, smooth hydrangea responds well to aggressive pruning. Prune in early spring to promote abundant flower growth. Start by removing any branches that were injured or killed over the winter, cutting them back to the main stem or ground level. It’s beneficial to remove some of the older stems entirely at the base to allow for more vigorous new shoots.
• Lightly trim additional branches to shape the plant and maintain its rounded form, this involves removing up to one-third of each stem’s length. Hard pruning back to 12-18 inches from the ground will result in a shrub that produces fewer but larger flower heads, which may be so large they require support.
Showcased below is a fully pruned Hydrangea Arborescens.
 |
Check out this video to guide you through your pruning:
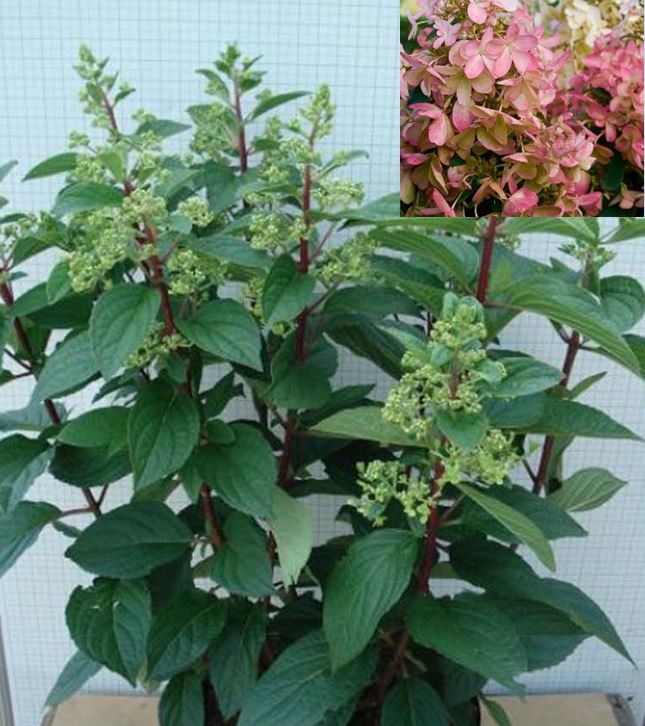
Hydrangea Paniculata ‘Vanille Fraise’ & Hydrangea Paniculata ‘Pinky Winky’
 |
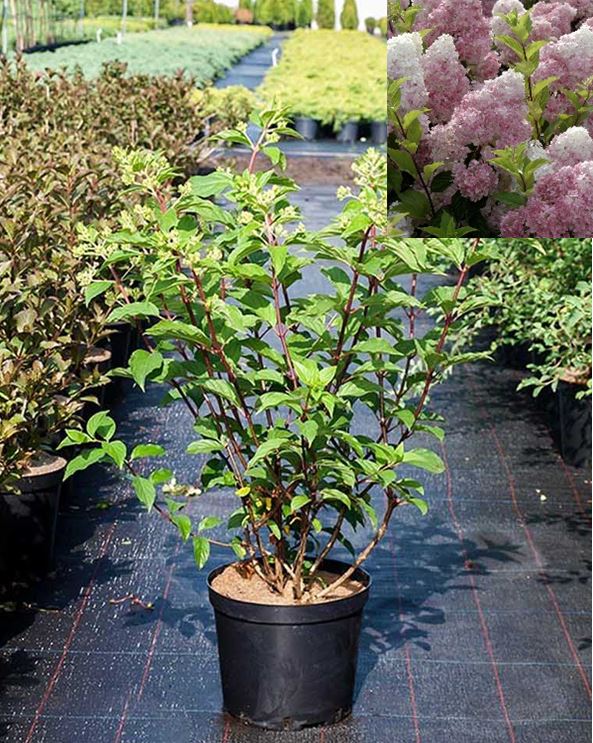 |
These cone-shaped clusters of flowers initially bloom in shades of white, cream, green, or pink, which later age to a maroon colour as the season progresses.They typically perform well in full morning sun but benefit from some shade in the afternoon. The flower panicles continue to grow, producing new white florets at the tip. Flowering Calendar: June – August |
• Hydrangea Paniculata blooms on new wood, so it needs no pruning at all. However, if you want to rejuvenate the plant, you can prune it within a few feet of the ground in late winter or early spring.
• As a general rule, don’t hesitate to prune the panicle hydrangea. More aggressive pruning results in more vigorous new shoots, leading to larger flower panicles in summer. You can safely shorten about one-third of the crown volume per pruning session. Unlike Hydrangea macrophylla, Hydrangea paniculata forms flower buds only on the new wood of the current year. Therefore, pruning won’t harm or remove flower buds.
• For a classic shrub shape, trim all shoots to stubs about 15 centimetres tall, leaving about 2 dormant buds, known as “sleeping eyes,” from which new shoots will sprout in spring. These buds appear as raised dots under the bark. Also, be sure to remove any diseased or dead wood completely.
Showcased below is a fully pruned Hydrangea Paniculata
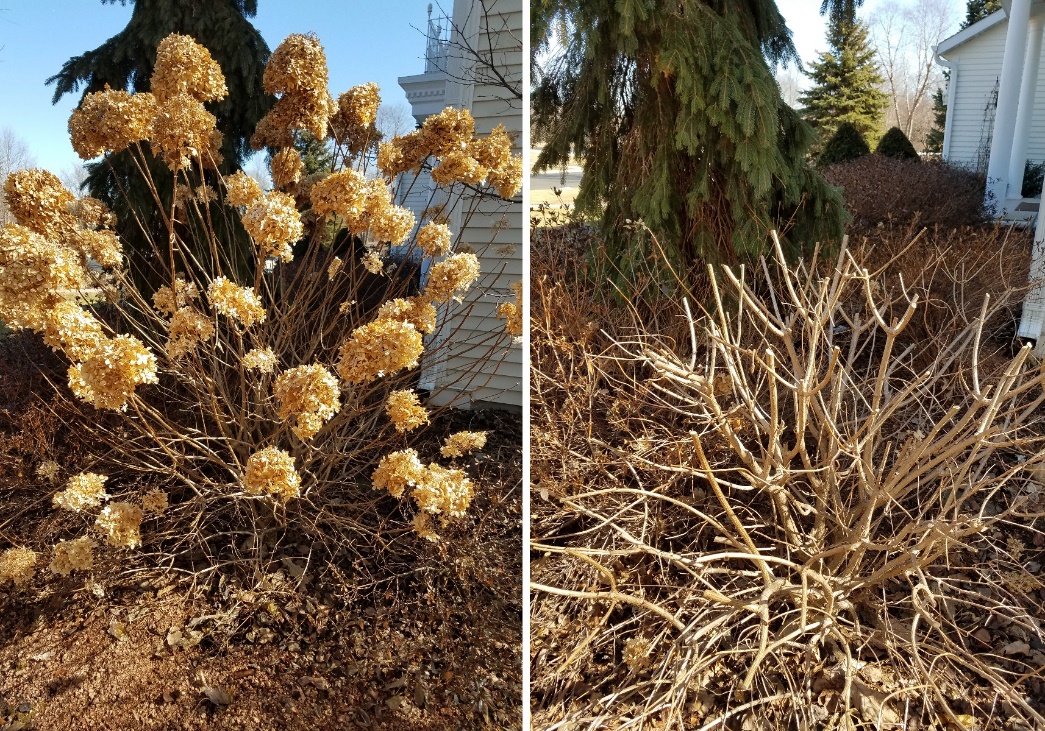 |
Check out this video to guide you through your pruning:
Hydrangea Quercifolia ‘Snow Queen’
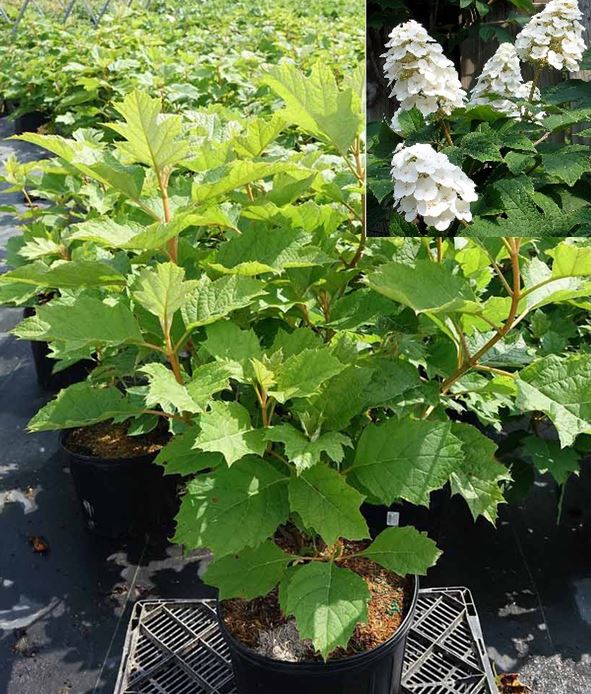 |
This exceptional hydrangea features large, bright green leaves resembling giant oak leaves and produces large cones of white flowers in late summer. During autumn, the foliage transforms into striking shades of coral, pink, and red, while the flowers transition from pale pink to brown. This fabulous shrub offers year-round interest and thrives best when planted in the center of a partially shaded border. Flowering Calendar: June – August |
• Hydrangea Quercifolia blooms on old wood and requires minimal pruning. In spring, after the risk of frost has passed, remove faded flowerheads by cutting back flowered stems to a strong pair of buds. Prune is done to control size or shape, not to stimulate new growth. If shaping is necessary, prune stems just above a leaf node. After flowering, remove faded flowers and any misplaced or diseased shoots.
Showcased below is a diagram to help you prune your Hydrangea Quercinforia:
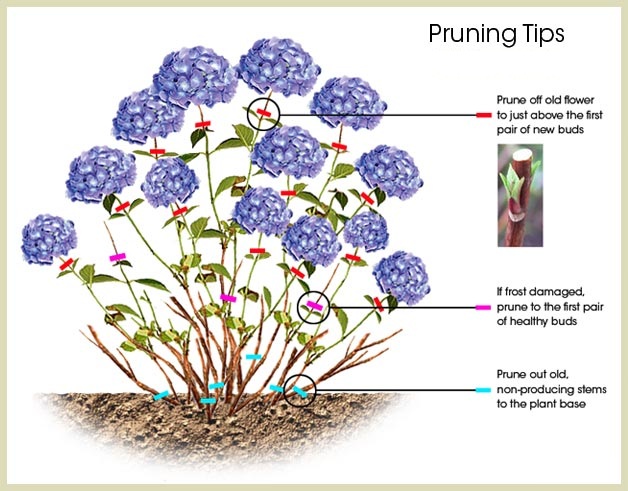 |
Check out this video to guide you through your pruning:
Growing Hydrangeas in Containers
Any hydrangea can thrive in a sufficiently large container, though some varieties are more ideal than others. Our top choice for containers is Hydrangea serrata ‘Bluebird’. Other suitable varieties include Hydrangea macrophylla and Hydrangea paniculata.
Successfully growing a hydrangea in a container hinge on a couple of key factors, beginning with your approach. First, determine whether your hydrangea planting will be temporary or permanent. Temporary plantings are intended to thrive for just one season. At season’s end, you might transplant your hydrangea into the garden or gift it to someone with suitable space. Permanent plantings remain in the same container for several seasons, possibly being transferred to a larger pot or directly into a garden spot over time.
Soil

• When planting hydrangeas in containers, start by using high-quality potting soil instead of garden soil, which can compact and lead to drainage issues. Potting soil also keeps the container lighter for easier mobility. Choose a lightweight, premium potting mix and blend it with one part compost at a ratio of four parts mix to one part compost. Ensure you’re using regular potting soil, not seed starting mix, which may lack necessary nutrients.
• To prevent soil from escaping through drainage holes, line the bottom of the container with fine mesh or a coffee filter before adding soil. Place enough potting soil in the bottom so that when you position the hydrangea, the top of its root ball sits at least 2 inches below the rim.
• Adjusting soil acidity for hydrangeas can be challenging in containers without knowing the current PH. It’s simpler to choose a hydrangea variety that naturally produces the desired flower colour.
• After removing the hydrangea from its nursery pot, centre it in the container and fill around the root ball with soil up to the top edge, ensuring not to cover the root ball itself. Water thoroughly and check soil level after settling, adding more soil as needed to fill any depressions. Consider applying a layer of organic mulch on the soil surface to retain moisture and keep roots cool during summer heat.
Choose The Right Pot

• The size and type of container for your hydrangea depend on whether you plan on treat it as an annual, keeping it in the pot for just one growing season, or as a perennial, where it will remain in the container season after season.
• For temporary plantings, the container material is less critical as long as it holds soil and has drainage holes for excess water. For permanent plantings, choose an all-weather pot that won’t crack in freezing temperatures, especially in cold climates. Avoid untreated porous containers made of clay, terracotta, or ceramic.
• The container size is crucial since the plant’s roots need room to grow. Generally, a large pot at least 24 inches in diameter can accommodate a small to midsized hydrangea for several years.
Watering
• Attentive watering is crucial for success! Keeping your potted hydrangea well-watered cannot be overstated. Soil in containers dries out much faster than garden soil, so check the moisture levels of your potted hydrangeas daily to ensure they are hydrated.
• When the top inch or so of potting mix feels dry to the touch, soak your plants thoroughly.Foliage is another sign that your hydrangeas need a drink.
• Water thoroughly around the entire base of the plant until water drains from the bottom.
• On hot summer days, it may be necessary to water even twice a day to prevent heat stress. The more sun exposure the hydrangea receives, the more water it needs.
• As your plant matures and the roots occupy more soil space, it will require more frequent watering.
Fertilizer
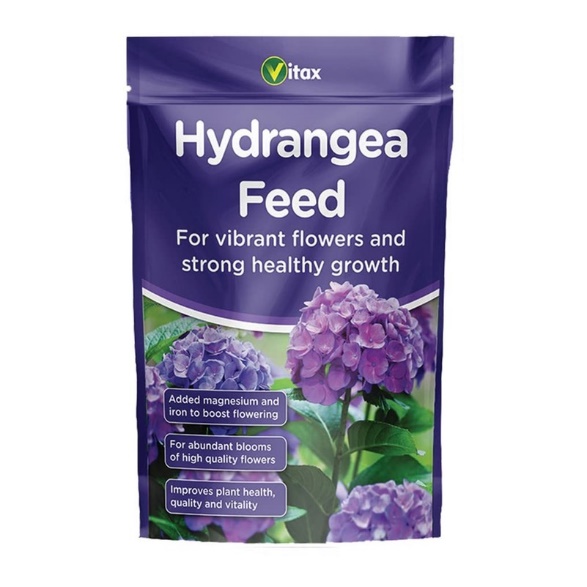
The fertilizer in potting soil is usually sufficient for temporary plantings, but for permanent plantings, you’ll need to fertilize annually after the first season. Use an all-purpose flowering shrub formula or a rose fertilizer, which provides the right nutrient ratio for hydrangeas. In early spring, apply the fertilizer around the plant’s base, avoiding direct contact with the branches, and water it thoroughly. Do not apply fertilizer after late July, as this can encourage growth and hinder proper dormancy.
• For healthy growth and flowering, it’s best to use a balanced, slow-release fertilizer designed for hydrangeas. Look for a fertilizer with an NPK ratio of 10-10-10 or other balanced proportions to provide the necessary nitrogen (N), phosphorus (P), and potassium (K). To influence flower color, add aluminumsulfate for blue blooms or garden lime for pink flowers.
Provide Light
Hydrangeas need full sun, dappled sun, or partial shade. One of the advantages of growing hydrangeas in containers is the flexibility to position your pots in a spot that provides the ideal amount of sun exposure. Generally, morning sun is preferable to afternoon sun. For optimal flowering, place your potted hydrangeas where they receive at least 4 to 6 hours of sunlight daily. The amount of sun they can tolerate depends on the type of hydrangea. Panicle hydrangeas are the most sun-tolerant and thrive in 6 or more hours of direct sunlight, while other varieties may prefer more shaded areas.
Pest Control
Around the UK the most common pests that affect Hydrangeas are:
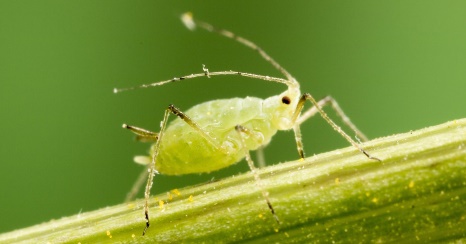 |
Aphids – These insects feed from the plant’s stems and leaves, causing distorted growth, yellowing, and a sticky substance called honeydew, which can lead to mould. |
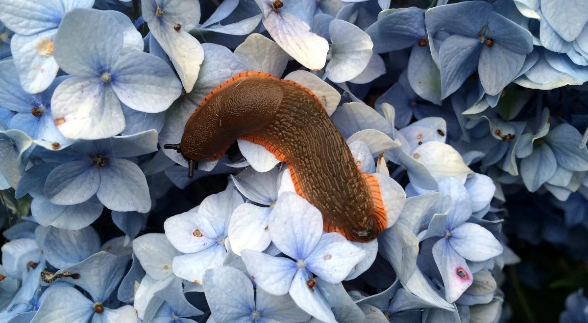 |
Slugs – These insects thrive in damp and shady conditions. They feed the foliage, leaving large holes in the leaves and sometimes stripping the plant of its leaves entirely. |
 |
Vine Weevils – The adult beetles chew notches in the leaf edges, while the larvae feed on the roots, which can cause the plant to wilt and eventually die. |
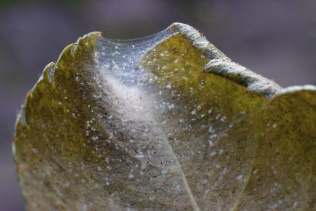 |
Spider Mites – These insects suck the plant’s sap, leading to stippling, yellowing, and premature leaf drop. |
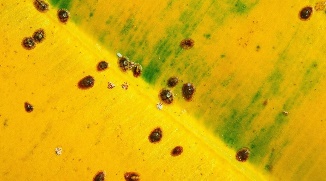 |
Scale – Scale sucks the sap from the plant, causing the plant to suffer and weaken, resulting in less vigour. |
By combining preventive measures, you can significantly reduce the risk of pest infestations on your hydrangeas and keep them healthy and vibrant throughout the growing season.
• Frequently inspect your hydrangeas for signs of pests, especially under the leaves, and handpick any visible pests.
• Apply neem oil or insecticidal soap to control aphids and spider mites, and use horticultural oil to smother scale insects.
• To prevent pests on hydrangeas, start by ensuring they are planted in well-draining soil with good air circulation.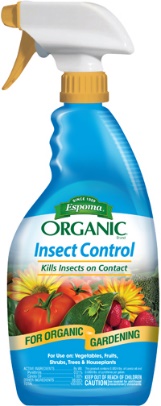
• Water at the base of the plant in the morning to keep the foliage dry and reduce the risk of fungal diseases.
• Apply mulch to retain moisture but keep it away from the plant base to avoid creating a habitat for pests.
• Regularly clean up fallen leaves and debris around the plants to eliminate potential hiding places.
• Keep your hydrangeas healthy by providing the proper nutrients and care, as strong plants are less susceptible to pest attacks.
• Use copper tape and slug traps to deter slugs and snails.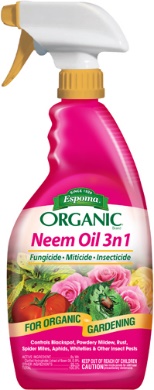
• Encourage beneficial insects like ladybirds and lacewings, which prey on pests such as aphids.
• Sprinkle diatomaceous earth around the base of the plants to deter crawling pests.
Hydrangea Diseases
Lush hydrangea bushes are undeniably beautiful, but their beauty can be marred by various fungal, viral, and bacterial diseases. Fortunately, there are steps you can take to protect your shrubs and keep them healthy.
1. Powdery Mildew
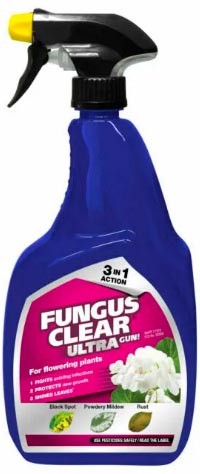 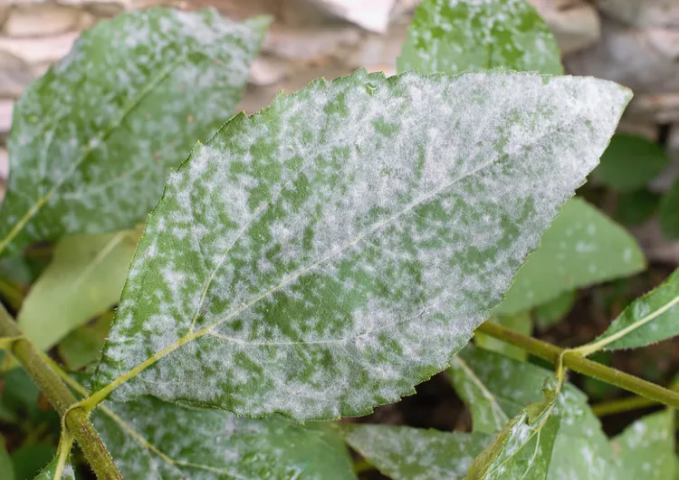 |
Powdery mildew on hydrangeas is caused by fungal pathogens and appears as white or grey powdery coatings on leaves and flowers. Poor air circulation often contributes to this issue. To reduce the risk of infection, plant hydrangeas with sufficient spacing in well-ventilated areas to allow for good airflow. Water the plants at the base, avoiding overhead watering to prevent spore dispersal from leaf to leaf. Specific treatments, such as fungicides, can help manage and prevent the spread of powdery mildew.
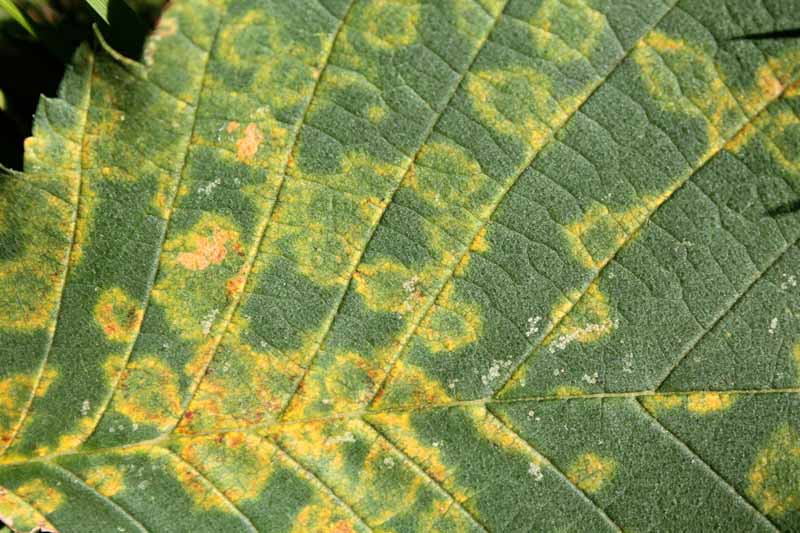
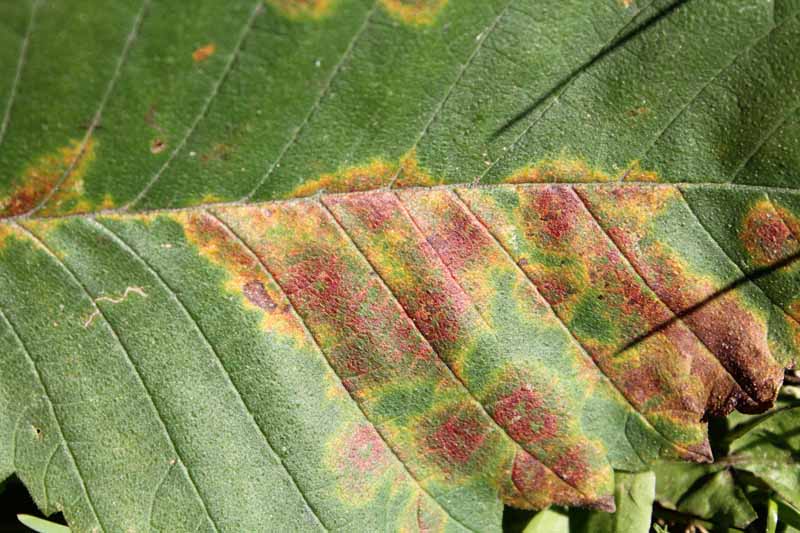
2. Rust
  |
Rust on hydrangeas is a common fungal disease that thrives in humid conditions, characterized by rusty-orange or reddish-brown spots on the underside of leaves, yellowing leaves, and defoliation.Thinning the inside of the hydrangea bush, cleaning rust infected leaves and fallen plant debris around both hemlock and hydrangea may help to manage this disease. Improving air circulation through proper spacing, pruning and a copper-basedfungicide helps combat rust.
3. Botrytis Blight
  |
Botrytis is more likely to occur under cool and damp conditions. To prevent this infection, keep the humidity low, avoid watering late in the day, and water only at the roots. Ensure good airflow around your plants by spacing them properly and pruning closely spaced branches. Sterilize your pruning shears with bleach as you prune to avoid spreading disease. Remove dead or damaged flowers and leaves to prevent the fungus from entering the plant, and clean up debris around the plant to eliminate places where Botrytis can thrive. If the problem persists, you may need to use fungicides such as iprodione or thiophanate-methyl.
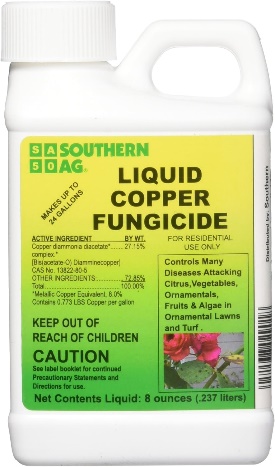
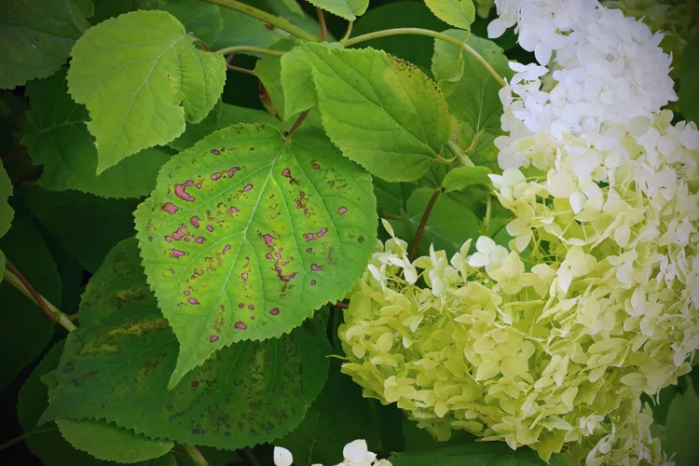
4. Leaf Spot
 Leaf spots on hydrangeas, caused by fungi such as Cercospora, Alternaria, Phyllosticta, or Anthracnose, are prevalent in moist conditions, though some develop in warm periods and others in cooler temperatures. Preventing water from remaining on leaves and using a good fungicide can usually resolve the problem. Bacterial leaf spot can be treated with a bactericide. In all cases, removing and destroying infected leaves can help prevent the spread of the disease.
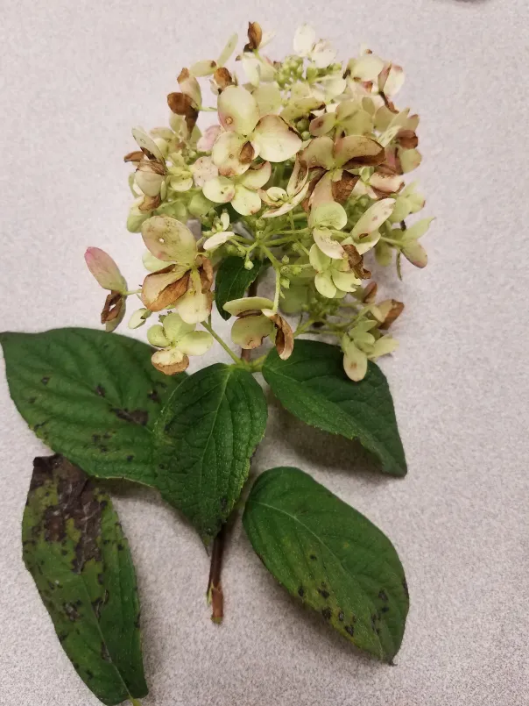
5. Bacterial Wilt
 Bacterial wilt is a disease that affects the flowers and leaves of hydrangeas, with the first sign being wilted flowers and leaves. It can spread rapidly, potentially causing the entire plant to die. The bacteria often enter the plant through wounds from pruning, damage, or natural openings created by insects.
To prevent bacterial wilt, always use clean and sharp pruning shears and sanitize your tools to avoid transferring bacteria from plant to plant. Unfortunately, there are no treatments available for bacterial wilt. Infected plants should be removed and destroyed to prevent the bacteria from spreading.
6. Mosaic Virus
 Mosaic virus presents as mosaic-like yellow patterns on leaves, with yellow veins and potentially distorted foliage and blotchy flowers. There is no cure for viral infections like mosaic virus; infected plants must be removed and disposed of. The virus can spread through garden tools and insects, such as aphids.To reduce the risk of spreading diseases, regularly clean garden tools. Consider companion planting techniques to attract beneficial predators, which can help manage aphids and other problematic insects in your garden.
7. Anthracnose
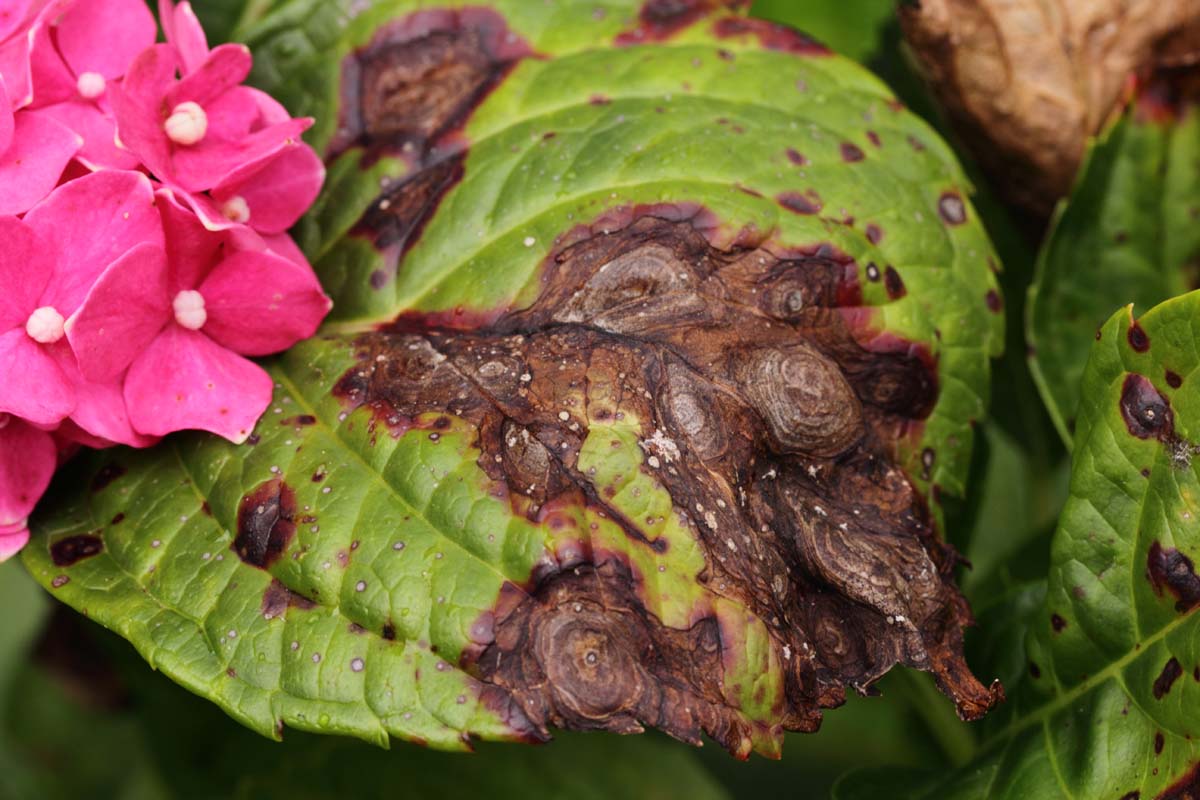 Anthracnose affects hydrangeas by causing brown spots on leaves and flowers, which can grow quickly. This disease thrives in warm, wet conditions and spreads easily through rain or irrigation. Infected tissue develops dark lesions that resemble a bullseye and can eventually die, reducing the plant’s vigour and making it more susceptible to other pests and diseases.
To prevent anthracnose, ensure proper drainage, good air circulation, and water only at the base of the hydrangea. Prune and remove infected parts of the plant and apply fungicidal treatments as necessary.
8. Ringspot Virus
 If your hydrangea has brown spots or rings on its leaves, it is likely infected with hydrangea ringspot virus. This virus causes leaves to become distorted and rolled, stunting the plant’s growth. Unlike some other diseases, aphids do not spread hydrangea ringspot virus; it spreads mechanically through contaminated tools. To prevent its spread, sanitize your pruning tools regularly. Unfortunately, there is no cure for this virus, and infected plants must be removed. However, there are varieties available that are tolerant to this virus.85
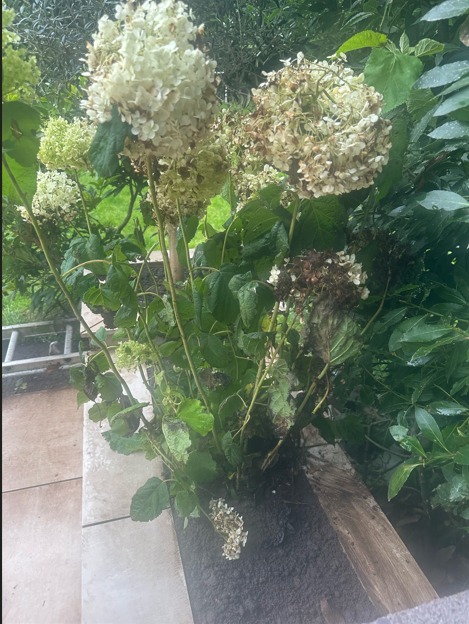
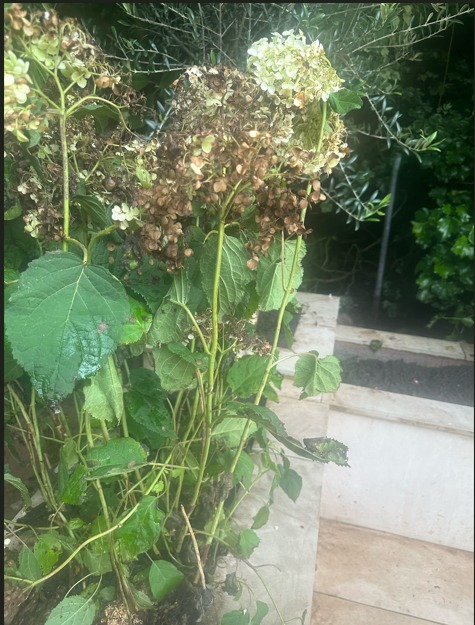
It is important to know the difference between a diseased and dehydrated Hydrangea.
When a hydrangea is dehydrated, it exhibits several noticeable signs:
• Wilted Leaves: The leaves will appear limp and droopy, losing their usual firm and lush appearance.
• Crispy Edges: The edges of the leaves may become dry and crispy, often turning brown.
• Dull Colour: The vibrant green colour of the leaves fades to a dull, lacklustre hue.
• Flower Decline: The flowers may also start to wilt, appearing lifeless and droopy. In severe cases, they might shrivel up completely.
• Leaf Drop: Dehydration can cause leaves to drop prematurely.
• Slow Growth: The overall growth of the plant may slow down or stop altogether as it struggles to conserve water.
As hydrangeas reach the end of their flowering season, they may exhibit signs of browning. The flowers will become drier and brown, necessitating pruning to encourage future blooming.Hydrangeas can bloom many times during their flowering season.
 |
 |
Please Note:
Plants are living specimens and can experience stress during transportation. Since we transfer plants from our suppliers in Italy and Spain, where temperatures are much higher, they can suffer short-term stress from transportation and heat. Prior to delivery, we reduce the water intake of the plants to minimize the weight of the pots. This can lead to temporary dehydration during transit. Addressing dehydration promptly by watering the hydrangea thoroughly and regularly can help revive the plant and restore its health.Rest assured, this process is standard practice among garden centers and has no long-term effects on the health of the plant. Upon delivery, please plant or repot your hydrangea as soon as possible to ensure it is well-hydrated and ready to settle into its new environment.
Thank you for choosing our hydrangeas to enhance your garden! We hope you find our care and maintenance guide helpful. For any further questions or assistance, please don’t hesitate to contact us. We’re here to help you enjoy the full beauty and bloom of your hydrangeas!